Very interesting project that permit users/system admins to browse through MySQL Database Backups (Dump Files).
PHP MySQLDump Browser
lundi 26 décembre 2011
vendredi 16 décembre 2011
jeudi 15 décembre 2011
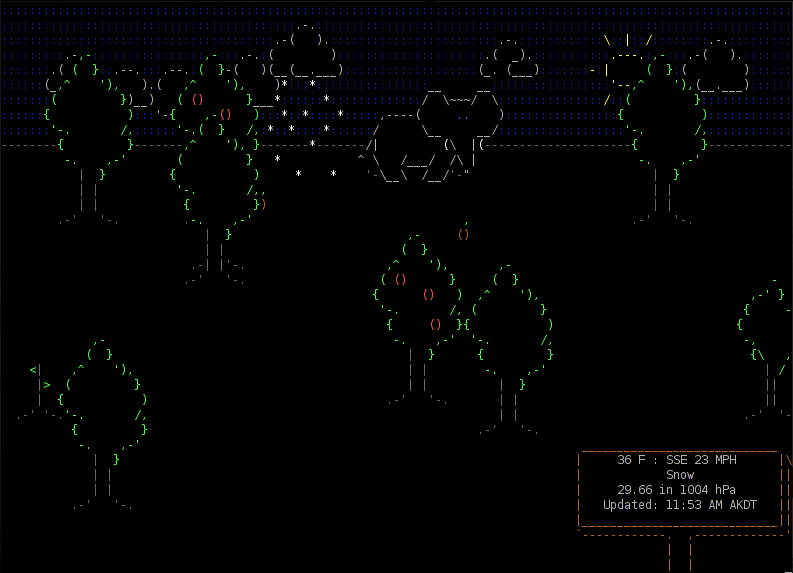
WeatherSpect
Another cool tools for geeks: WeatherSpect. Distributed on Robobunny website (same as ASCIIQuarium).
This program uses weather data supplied by the Weather::Underground module to create an ASCII animation that simulates the weather. There is also a large number of random creatures and objects that walk across this screen.
Install the prerequisites if you haven't already done (for CentOS distro as usual):
Now have fun ! (press 'q' for quit)
Screenshot:
 Website: http://robobunny.com/projects/weatherspect/html/
This program uses weather data supplied by the Weather::Underground module to create an ASCII animation that simulates the weather. There is also a large number of random creatures and objects that walk across this screen.
Install the prerequisites if you haven't already done (for CentOS distro as usual):
cpan install Term::Animation
yum install -y perl-Curses
Install WeatherSpect:
cd /downloads/
wget http://robobunny.com/projects/weatherspect/weatherspect.tar.gz
tar -xvzf weatherspect.tar.gz
cd weatherspect_v1.9/
chmod 755 weatherspect
cp weatherspect /usr/bin/
cd ~
Generate config file:
[root@ygwane ~]$ weatherspect -c
Accepted formats for location:
        Zipcode
        City
        City, State
        State
        City, Country
        Country
Your Location: Apt, France
Temperature ( (C)elsius, (F)ahrenheit, (B)oth ) [B] C
Wind Speed ( (K)PH, (M)PH, (B)oth ) [B] K
Creating config file in /root/.weatherspect...
It's possible to change your location (and some others features) by editing the config file /root/.weatherspect ... Now have fun ! (press 'q' for quit)
weatherspectWe can have a weather report by pressing 'w' (press again 'w' to close the report)
Screenshot:
vendredi 9 décembre 2011
ASCIIQuarium
For all geeks who are searching funny and useless tools, I wanna show you the better one for me: ASCIIQuarium ...
This is an ascii aquarium screensaver for Linux terminals that permits to: "Enjoy the mysteries of the sea from the safety of your own terminal!"
First we have to install the prerequisites (for CentOS distro as usual):
 Website: http://robobunny.com/projects/asciiquarium/html/
This is an ascii aquarium screensaver for Linux terminals that permits to: "Enjoy the mysteries of the sea from the safety of your own terminal!"
First we have to install the prerequisites (for CentOS distro as usual):
cpan install Term::Animation
yum install -y perl-Curses
Then, we can install ASCIIQuarium:
cd /downloads
wget http://www.robobunny.com/projects/asciiquarium/asciiquarium.tar.gz
tar -xvzf asciiquarium.tar.gz
cd asciiquarium_1.0/
chmod 755 asciiquarium
cp asciiquarium /usr/bin/
cd ~
Woaw ! The sysadmins will be able to relax with this beautiful fish tank henceforth ...
asciiquariumScreenshot:
Speedometer
Here is an interesting project that permits to display and measure the rate of data across a network connection or data being stored in a file.
This tool is named Speedometer. He needs python 2.6 (or higher) to operate.
We're gonna see how to install it and use it. It's really easy !
For Debian based distros, simply launch:
Here's some usage examples given on Speedometer Web page:
How long it will take for my 38MB transfer to finish?


 Link to Speedometer Web page: http://excess.org/speedometer/
We're gonna see how to install it and use it. It's really easy !
For Debian based distros, simply launch:
apt-get install speedometerFor others distros (like us with CentOS), We first have to download and install Urwid:
cd /downloads
wget http://excess.org/urwid/urwid-1.0.1.tar.gz
tar -xvzf urwid-1.0.1.tar.gz
cd urwid-1.0.1
python setup.py install
Then we can install Speedometer like this:
cd /downloads
wget http://excess.org/speedometer/speedometer-2.8.tar.gz
tar -xvzf speedometer-2.8.tar.gz
cp speedometer.py /usr/local/bin/speedometer
chown root: /usr/local/bin/speedometer
chmod 755 /usr/local/bin/speedometer
That's all ! Now, let's see the help command of this little tool:
[root@localhost ~]$ speedometer
Usage: speedometer [options] tap [[-c] tap]...
Monitor network traffic or speed/progress of a file transfer.  At least one
tap must be entered.  -c starts a new column, otherwise taps are piled
vertically.

Taps:
  -f filename [size]          display download speed [with progress bar]
  -r network-interface        display bytes received on network-interface
  -t network-interface        display bytes transmitted on network-interface
  -c                          start a new column for following tap arguments

Options:
  -b                          use old blocky display instead of smoothed
                              display even when UTF-8 encoding is detected
                              (use this if you see strange characters)
  -i interval-in-seconds      eg. "5" or "0.25"   default: "1"
  -k (1|16|88|256)            set the number of colors this terminal
                              supports (default 16)
  -l                          use linear charts instead of logarithmic
                              you will VERY LIKELY want to set -m as well
  -m chart-maximum            set the maximum bytes/second displayed on
                              the chart (default 2^32)
  -n chart-minimum            set the minimum bytes/second displayed on
                              the chart (default 32)
  -p                          use original plain-text display (one tap only)
  -s                          use bits/s instead of bytes/s
  -x                          exit when files reach their expected size
  -z                          report zero size on files that don't exist
                              instead of waiting for them to be created

Note: -rx and -tx are accepted as aliases for -r and -t for compatibility
with earlier releases of speedometer.  -f may be also omitted for similar
reasons.

Python Version: 2.7
Urwid >= 0.9.9.1 detected: yes  UTF-8 encoding detected: yes
To display live RX traffic on eth0 network interface, simply launch (press 'q' to quit):
speedometer -rx eth0To display live TX traffic on eth0 network interface, launch:
speedometer -tx eth0
Here's some usage examples given on Speedometer Web page:
How long it will take for my 38MB transfer to finish?
speedometer favorite_episode.rm $((38*1024*1024))How quickly is another transfer going?
speedometer dl/big.aviHow fast is this LAN?
host-a$ cat /dev/zero | nc -l -p 12345

host-b$ nc host-a 12345 > /dev/null
host-b$ speedometer -rx eth0
How fast is the upstream on this ADSL line? (start an upload first)
speedometer -tx ppp0How fast can I write data to my filesystem? (with at least 1GB free)
dd bs=1000000 count=1000 if=/dev/zero of=big_nothing &
speedometer big_nothing
To finish, let me show you some screenshots that we can see on Speedometer Web page:
mercredi 30 novembre 2011
mardi 15 novembre 2011
Move MySQL datadir
We are going to see how to move MySQL datadir without loosing data. This is usefull when you meet a disk space problem or when you want to change your database server.
Operation is very simple, we just have to create a new directory in which we are going to copy the old datadir content. MySQL must be stopped before the copy to be sure that nothing will be modified during the data copy. Then we have to edit the mysql config file to define the new datadir. Finally, restart MySQL server and check that everything is ok. old mysql datadir: /var/lib/mysql new mysql datadir: /opt/mysql/datadir Here is the detail of commands:
Operation is very simple, we just have to create a new directory in which we are going to copy the old datadir content. MySQL must be stopped before the copy to be sure that nothing will be modified during the data copy. Then we have to edit the mysql config file to define the new datadir. Finally, restart MySQL server and check that everything is ok. old mysql datadir: /var/lib/mysql new mysql datadir: /opt/mysql/datadir Here is the detail of commands:
# create directory, chown, chmod it
mkdir /opt/mysql/datadir
chown mysql:mysql /opt/mysql/datadir
chmod 0755 /opt/mysql/datadir

# save my.cnf
cp /etc/my.cnf /etc/my.cnf.bak

# stop mysql
/etc/init.d/mysql.server stop

# change datadir in my.cnf
vim /etc/my.cnf

:%s?/var/lib/mysql?/opt/mysql/datadir?g

:wq

# copy old datadir to new datadir
cp -rp /var/lib/mysql/* /opt/mysql/datadir/

# start mysql
/etc/init.d/mysql.server start
Now it's important to check that everything working fine, if all is ok we can remove the old datadir:
rm -rf /var/lib/mysqlOtherwise, we go back like this:
/etc/init.d/mysql.server stop
mv /etc/my.cnf /etc/my.cnf2 && mv /etc/my.cnf.bak /etc/my.cnf
/etc/init.d/mysql.server start
mercredi 2 novembre 2011
PHP Server Monitor
PHP Server Monitor is a script that monitors the status of a server or service in a list on a given port. It comes with a web interface from which you can add a server or service, this interface is coupled to a MySQL database. We can also manage users will be alerted for each service by mail or SMS in case of failure. To check a site, the script will use cURL to interpret the HTTP code.
Features:
* check if services (ie IMAP) are up and running on your servers
* check if websites are available (ie no 404 Not found errors)
* get email notifications if a server or website goes down
* get sms (text message) notifications if a server or website goes down
* add multiple users with email address and phone number
* choose who receives the notifications for each server
* easy to use interface
* saves all errors in a log table
* see response time from servers and websites
* separate cronjob file
Install:
Use:
http://myserver/phpservermon
To check services, we need to configure a cron job with provided script in project:

Project page:
http://sourceforge.net/projects/phpservermon/
Features:
* check if services (ie IMAP) are up and running on your servers
* check if websites are available (ie no 404 Not found errors)
* get email notifications if a server or website goes down
* get sms (text message) notifications if a server or website goes down
* add multiple users with email address and phone number
* choose who receives the notifications for each server
* easy to use interface
* saves all errors in a log table
* see response time from servers and websites
* separate cronjob file
Install:
cd /downloads
wget http://downloads.sourceforge.net/.../phpservermon-2.0.1.zip...
unzip phpservermon-2.0.1.zip
mv phpservermon /var/www/html/
chown -R apache:apache /var/www/html/phpservermon
cd /var/www/html/phpservermon
mv config.inc.php.sample config.inc.php
vim config.inc.php

// Database information
// Prefix used for tables
define('SM_DB_PREFIX', 'monitor_');
// Database username
define('SM_DB_USER', 'root');
// Database password
define('SM_DB_PASS', 'yourpassword');
// Database name
define('SM_DB_NAME', 'phpservermon');
// Database host
define('SM_DB_HOST', 'localhost');

:wq

mysql -e "create database phpservermon;"

http://myserver/phpservermon/install.php

rm /var/www/html/phpservermon/install.php
Use:
http://myserver/phpservermon
To check services, we need to configure a cron job with provided script in project:
crontab -e

*/5 * * * * /usr/bin/php -q /var/www/html/phpservermon/cron/status.cron.php

:wq
Project page:
http://sourceforge.net/projects/phpservermon/
lundi 31 octobre 2011
vendredi 7 octobre 2011
jeudi 6 octobre 2011
Bash: script compte à rebours
Voici un petit script bash permettant d'afficher un compte à rebours dans le shell. On va utiliser une fonction pour ça: decompte.
On va afficher un décompte de 30 secondes avant de revenir sur le prompt.
[root@localhost ~]# vim compte_a_rebours.sh

#!/bin/bash

# fonction rebours
# Affichage d'un compte à rebours
# Usage : rebours [nombre de secondes]
# Notes : le "echo -e" permet l'utilisation des caractères spéciaux
decompte() {
    i=$1
    echo " "
    while [[ $i -ge 0 ]]
      do
        echo -e "\033[31m\r "$i" \c\033[0m"
        sleep 1
        i=$(expr $i - 1)
    done
    echo " -  "
    echo -e "\033[32mFin du decompte\033[0m"
}


# appel d'un compte à rebours de 5 secondes
decompte 30
exit

:wq

[root@localhost ~]# chmod 755 compte_a_rebours.sh
[root@localhost ~]# ./compte_a_rebours.sh

 0  -
Fin du decompte
[root@localhost ~]#
lundi 3 octobre 2011
Apache benchmark with Siege
Siege is an http load testing and benchmarking utility. It was designed to let web developers measure their code under duress, to see how it will stand up to load on the internet. Siege supports basic authentication, cookies, HTTP and HTTPS protocols. It lets its user hit a web server with a configurable number of simulated web browsers. Those browsers place the server "under siege."
Siege can be installed with yum (2.66 version from rpmforge repo or 2.70 version from epel repo) or from sources that can be found on the project website. In our case, we will use rpm package from epel repo.
Installation and initial configuration :
[root@localhost ~]# yum install siege -y
[root@localhost ~]# siege.config
New configuration template added to /root/.siegerc
Run siege -C to view the current settings in that file
[root@localhost ~]# siege -C
CURRENT  SIEGE  CONFIGURATION
JoeDog/1.00 [en] (X11; I; Siege 2.70)
Edit the resource file to change the settings.
----------------------------------------------
version:                        2.70
verbose:                        true
debug:                          false
protocol:                       HTTP/1.1
connection:                     close
concurrent users:               15
time to run:                    n/a
repetitions:                    n/a
socket timeout:                 30
delay:                          1 sec
internet simulation:            false
benchmark mode:                 false
failures until abort:           1024
named URL:                      none
URLs file:                      /usr/etc/urls.txt
logging:                        true
log file:                       /var/siege.log
resource file:                  /root/.siegerc
allow redirects:                true
allow zero byte data:           true
allow chunked encoding:         true
proxy auth:
www auth:
Available options:
[root@localhost ~]# siege -h
SIEGE 2.70
Usage: siege [options]
       siege [options] URL
       siege -g URL
Options:
  -V, --version           VERSION, prints the version number.
  -h, --help              HELP, prints this section.
  -C, --config            CONFIGURATION, show the current config.
  -v, --verbose           VERBOSE, prints notification to screen.
  -g, --get               GET, pull down HTTP headers and display the
                          transaction. Great for application debugging.
  -c, --concurrent=NUM    CONCURRENT users, default is 10
  -i, --internet          INTERNET user simulation, hits URLs randomly.
  -b, --benchmark         BENCHMARK: no delays between requests.
  -t, --time=NUMm         TIMED testing where "m" is modifier S, M, or H
                          ex: --time=1H, one hour test.
  -r, --reps=NUM          REPS, number of times to run the test.
  -f, --file=FILE         FILE, select a specific URLS FILE.
  -R, --rc=FILE           RC, specify an siegerc file
  -l, --log[=FILE]        LOG to FILE. If FILE is not specified, the
                          default is used: PREFIX/var/siege.log
  -m, --mark="text"       MARK, mark the log file with a string.
  -d, --delay=NUM         Time DELAY, random delay before each requst
                          between 1 and NUM. (NOT COUNTED IN STATS)
  -H, --header="text"     Add a header to request (can be many)
  -A, --user-agent="text" Sets User-Agent in request

Copyright (C) 2010 by Jeffrey Fulmer, et al.
This is free software; see the source for copying conditions.
There is NO warranty; not even for MERCHANTABILITY or FITNESS
FOR A PARTICULAR PURPOSE.
Testing:
[root@localhost ~]# siege -b -c 10 -r 3 http://nuxadmin.blogspot.com
** SIEGE 2.70
** Preparing 10 concurrent users for battle
The server is now under siege...
HTTP/1.1 200   1.04 secs:   95476 bytes ==> /
HTTP/1.1 200   1.17 secs:   95476 bytes ==> /
HTTP/1.1 200   1.19 secs:   95476 bytes ==> /
HTTP/1.1 200   1.56 secs:   95476 bytes ==> /
HTTP/1.1 200   1.80 secs:   95476 bytes ==> /
HTTP/1.1 200   0.79 secs:   95476 bytes ==> /
HTTP/1.1 200   1.85 secs:   95476 bytes ==> /
HTTP/1.1 200   2.07 secs:   95476 bytes ==> /
HTTP/1.1 200   1.12 secs:   95476 bytes ==> /
HTTP/1.1 200   0.81 secs:   95476 bytes ==> /
HTTP/1.1 200   2.78 secs:   95476 bytes ==> /
HTTP/1.1 200   1.07 secs:   95476 bytes ==> /
HTTP/1.1 200   0.85 secs:   95476 bytes ==> /
HTTP/1.1 200   2.93 secs:   95476 bytes ==> /
HTTP/1.1 200   1.15 secs:   95476 bytes ==> /
HTTP/1.1 200   0.91 secs:   95476 bytes ==> /
HTTP/1.1 200   2.16 secs:   95476 bytes ==> /
HTTP/1.1 200   1.68 secs:   95476 bytes ==> /
HTTP/1.1 200   1.31 secs:   95476 bytes ==> /
HTTP/1.1 200   0.78 secs:   95476 bytes ==> /
HTTP/1.1 200   1.20 secs:   95476 bytes ==> /
HTTP/1.1 200   1.37 secs:   95476 bytes ==> /
HTTP/1.1 200   2.00 secs:   95476 bytes ==> /
HTTP/1.1 200   1.45 secs:   95476 bytes ==> /
HTTP/1.1 200   1.36 secs:   95476 bytes ==> /
HTTP/1.1 200   0.61 secs:   95476 bytes ==> /
HTTP/1.1 200   0.58 secs:   95476 bytes ==> /
HTTP/1.1 200   5.55 secs:   95476 bytes ==> /
HTTP/1.1 200   0.49 secs:   95476 bytes ==> /
HTTP/1.1 200   0.47 secs:   95476 bytes ==> /
done.                                                                                                                                                             Transactions:                      30 hits
Availability:                 100.00 %
Elapsed time:                   6.52 secs<
Data transferred:               2.73 MB
Response time:                  1.47 secs
Transaction rate:               4.60 trans/sec
Throughput:                     0.42 MB/sec
Concurrency:                    6.76
Successful transactions:          30
Failed transactions:               0
Longest transaction:            5.55
Shortest transaction:           0.47

FILE: /var/siege.log
You can disable this annoying message by editing
the .siegerc file in your home directory; change
the directive 'show-logfile' to false
Another test:
[root@localhost ~]# siege -c 30 -i -t 30s -d 5 http://nuxadmin.blogspot.com
...
Lifting the server siege...      done.                                           Transactions:                     167 hits
Availability:                 100.00 %
Elapsed time:                  29.59 secs
Data transferred:              15.21 MB
Response time:                  2.48 secs
Transaction rate:               5.64 trans/sec
Throughput:                     0.51 MB/sec
Concurrency:                   13.99
Successful transactions:         167
Failed transactions:               0
Longest transaction:            6.84
Shortest transaction:           0.78
...

dimanche 14 août 2011
Hack Wii 4.3 sans jeux
La célèbre team Twiizers vient de rendre disponible son tout nouveau projet dénommé LetterBomb et devance Giantpune qui a visiblement un peu trop attendu pour distribuer son outil nommé Mailbox Bomb.
LetterBomb permet donc de hacker la console Nintendo Wii fonctionnant avec le firmware 4.3 sans avoir besoin d'exploiter les failles des célèbres jeux nécessaires jusqu'à présent.
Les profiteurs qui vendaient un Lego Indiana Jones à 150 € sur Ebay vont devoir se trouver un autre business car la côte de ces jeux qui permettent le hack risquent de baisser rapidement !
Pour récupérer LetterBomb, il suffit de se rendre sur le site http://please.hackmii.com/ et indiquer l'adresse MAC de sa console.
On se retrouve alors avec une archive nommée LetterBomb.zip qu'il faudra dézipper à la racine d'une carte SD (comme d'habitude: maximum 2Go, formatée en FAT32).
Il suffit ensuite d'insérer la carte SD dans la Wii puis de consulter ses mails et lire le message 'LetterBomb' ceci va lancer HackMii à partir duquel on pourra installer BootMii et l'Homebrew Channel.
La Wii est désormais hackée et il ne reste plus qu'à installer le homebrew USB Loader GX pour pouvoir lancer ses backups depuis un sotckage USB.
Source: http://hackmii.com/2011/08/letterbomb/
mardi 2 août 2011
10 essential MySQL tools for admins
I found this very interesting article about MySQL tools on networkworld yesterday, it describes the following tools:
mk-query-digest
mydumper
xtrabackup and xtrabackup-manager
tcprstat
mk-table-checksum
stalk and collect
mycheckpoint
shard-query
mk-archiver
oak-security-audit
Here is the link:
mk-query-digest
mydumper
xtrabackup and xtrabackup-manager
tcprstat
mk-table-checksum
stalk and collect
mycheckpoint
shard-query
mk-archiver
oak-security-audit
Here is the link:
mercredi 27 juillet 2011
MySQL-MHA: HA replication tool
A new MySQL project about high availability is proposed by Yoshinori Matsunobu. This project permits to automating master failover and slave promotion within short downtime.
This is the first time that we can see a serious MySQL failover project into replication environment. I haven't tested it yet but lot of people speak about MySQL-MHA on the web actually. Yoshinori Matsunobu is associate with SkySQL for that they provide the commercial support.
MySQL-MHA brings a lot of advantages such as:
Every informations and descriptions can be found on the google code web page of MySQL-MHA.
You can know more about Yoshinori Matsunobu on his blog.
Project is released few days ago and I think that it will no need to wait for a long time to seeing this marvelous tools into your MySQL production replication environment.

This is the first time that we can see a serious MySQL failover project into replication environment. I haven't tested it yet but lot of people speak about MySQL-MHA on the web actually. Yoshinori Matsunobu is associate with SkySQL for that they provide the commercial support.
MySQL-MHA brings a lot of advantages such as:
- Automated master monitoring and failover
- Interactive (manual) Master Failover
- Non-interactive master failover
- Online switching master to a different host
Every informations and descriptions can be found on the google code web page of MySQL-MHA.
You can know more about Yoshinori Matsunobu on his blog.
Project is released few days ago and I think that it will no need to wait for a long time to seeing this marvelous tools into your MySQL production replication environment.
lundi 25 juillet 2011
Cobbler installation server
INTRODUCTION
Cobbler is an installation server that permits to install easily and automatically operating systems, virtualized or not with PXE. We will describe installation, configuration and use into this howto.
For this howto we use a CentOS 5 x86_64 distro.

INSTALLATION
First thing to do is to configure DHCP server. In our case, Cobbler server is not on the same machine that DHCP server, so we have to register the PXE class for Cobbler server on DHCP server.
Here is the part of dhcpd.conf config file regarding Cobbler service. After configuration, we have to restart the DHCP service to validate changes:
CONFIGURATION
For configuration, we will initially adjust cobbler parameters, we have to define an encrypted password that will be the root password for the machine installed with PXE and we define IP address for cobbler server.
We begin by creating the encrypted password using htpasswd:
We have so customized CentOS using CD1 of CentOS. A Howto was written on this blog about customization of CentOS, you can find it here: Customize CentOS
We are going to use this custom ISO file for the import into Cobbler server.
First, we must download this ISO file locally (on Cobbler server) then we gonna mount it and import it.
This operation takes time and a lot of disk space. Knowing that we have no need of all packages available on the official CentOS repo we will create a local repo with little packets which will occupy little disk space but more importantly to make the installation via PXE even faster.
So to create the local repo, we have to install a virtual machine using the custom CentOS ISO created previously (howto on the blog) and then we're gonna download all installed packages locally (on the virtual machine) for create the local repository.
I don't detail the installation of a VM from customized CentOS ISO (I assume you know how to do this).
To download installed packages, we're gonna use a method described previously on this blog too (here is the article: Download RPM packages with yum): with yumdownloader program
COBBLER WEB
We will now install the web interface allows the administration of the cobbler and then configure:
Login: cobbler
Password: cobbler
On this web interface, you can do everything that you can do from command line interface (CLI).
KOAN
Koan is a small program that adds to cobbler and interacts with it for reinstallation and virtualization management. Koan means: kickstart over a network, thus we can use it on a client server to calling cobbler server.
In our case, we will mainly use it for deploying virtual machines. It can be installed via yum, but a more current version is available from the EPEL repo.
Be careful about kernel used in CentOS custom ISO. In my experience, I met problems with some kernels on Xen systems using koan.
To get koan and install it:
This howto is ended, I hope that you can apply it in your workspace and that you understand how having a Cobbler server working perfectly. I use a CentOS environment but I think that other distros are supported with this system. Contact me if you need more help with Cobbler.
Cobbler is an installation server that permits to install easily and automatically operating systems, virtualized or not with PXE. We will describe installation, configuration and use into this howto.
For this howto we use a CentOS 5 x86_64 distro.
INSTALLATION
First thing to do is to configure DHCP server. In our case, Cobbler server is not on the same machine that DHCP server, so we have to register the PXE class for Cobbler server on DHCP server.
Here is the part of dhcpd.conf config file regarding Cobbler service. After configuration, we have to restart the DHCP service to validate changes:
vi /etc/dhcp/dhcpd.conf

        host cobbler
        {
                option host-name "cobbler";
                ddns-hostname "cobbler";
                hardware ethernet 00:00:00:00:00:00; #MAC address of cobbler server
                fixed-address 192.168.0.XX; #IP of Cobbler server
                allow booting;
                allow bootp;
                class "PXE" {
                match if substring(option vendor-class-identifier, 0, 9) = "PXEClient";
                next-server 192.168.0.XX; #IP of Cobbler server
                filename "pxelinux.0";
        }
        }

:wq

/etc/init.d/dhcpd restart
Next, an easy yum command permits to install the Cobbler service on the server:yum install PyYAML cobbler cobbler-webInstallation is now finished.
CONFIGURATION
For configuration, we will initially adjust cobbler parameters, we have to define an encrypted password that will be the root password for the machine installed with PXE and we define IP address for cobbler server.
We begin by creating the encrypted password using htpasswd:
/usr/bin/htpasswd -c /home/htpasswd root
New password: [cobbler]
Re-type new password: [cobbler]
Adding password for user root

cat /home/htpasswd

root:xH.KydRoK8CyQ
The password to use in the config file of Cobbler server is located after 'root', now we can edit the config file of Cobbler server:
vi /etc/cobbler/settings

default_password_crypted: xH.KydRoK8CyQ

next_server: 192.168.0.XX #IP of Cobbler server

server: 192.168.0.XX #IP of Cobbler server

:wq
Then we will install the services needed to run cobbler:
yum install tftp tftp-server xinetd
/etc/init.d/xinetd start
/etc/init.d/cobblerd start
chkconfig xinetd on
chkconfig cobblerd on
Now we will monitor the proper Cobbler configuration and adjust the parameters as will be shown:
cobbler check

/etc/init.d/httpd start

vi /etc/xinetd.d/rsync
 disable = no
:wq

yum install cman

cobbler get-loaders

yum install debmirror
vi /etc/debmirror.conf
 # @dists="sid";
 # @arches="i386";
:wq

/etc/init.d/cobblerd restart

cobbler sync
cobbler check
Cobbler is now properly configured. The next step is to import the ISO distribution that we want to make it available via PXE. In our case we will use CentOS and import can not be done with the netinstall ISO and ISO DVD includes too many packages that do not serve us.
We have so customized CentOS using CD1 of CentOS. A Howto was written on this blog about customization of CentOS, you can find it here: Customize CentOS
We are going to use this custom ISO file for the import into Cobbler server.
First, we must download this ISO file locally (on Cobbler server) then we gonna mount it and import it.
mount -t auto -o loop /downloads/CentOS-5.5-x86_64-core.iso /mnt/
cobbler import --path=/mnt --name=Centos5 –arch=x86_64

cobbler sync
cobbler list

distros:
   Centos5-x86_64
   Centos5-xen-x86_64

profiles:
   Centos5-x86_64
   Centos5-xen-x86_64

systems:

repos:

images:
We can see in this list (distros and profiles) that CentOS ISO was added to Cobbler server. Now we have to create local repository. We could use the official repo CentOS but be aware that the cobbler will grab all the packages locally from the repo.
This operation takes time and a lot of disk space. Knowing that we have no need of all packages available on the official CentOS repo we will create a local repo with little packets which will occupy little disk space but more importantly to make the installation via PXE even faster.
So to create the local repo, we have to install a virtual machine using the custom CentOS ISO created previously (howto on the blog) and then we're gonna download all installed packages locally (on the virtual machine) for create the local repository.
I don't detail the installation of a VM from customized CentOS ISO (I assume you know how to do this).
To download installed packages, we're gonna use a method described previously on this blog too (here is the article: Download RPM packages with yum): with yumdownloader program
mkdir /tmp/rpm
yum update -y
yum install yum-utils -y
rm -rf /root/rpm.log &&rpm -qa > rpm.log
for i in $(cat /root/rpm.log) ; do yumdownloader $i --destdir=/tmp/rpm ; done
Then, we declare this local repo on the Cobbler server. To do this we copy every rpm packages into /tmp/rpm directory's on the VM to /tmp/rpm on the Cobbler server:
# Copy packages from VM to Cobbler server
scp -r /tmp/rpm/* user@IP_COBBLER:/tmp/rpm/
# Declare Cobbler local repo
cobbler repo add --mirror=/tmp/rpm/ --name=centos5-local
cobbler reposync
We can see now the cobbler local repo:
cobbler list

repos:
   centos5-local
Then we will edit the default kickstart file, this file permits to automate CentOS install:
cd /var/lib/cobbler/kickstarts/
mv sample.ks sample.ks_bak
vi sample.ks

auth --useshadow --enablemd5
bootloader --location=mbr
clearpart --all --initlabel
text
firewall --disabled
firstboot --disable
keyboard fr-pc
lang fr_FR.UTF-8
url --url=$tree
$yum_repo_stanza
$SNIPPET('network_config')
reboot

rootpw --iscrypted $default_password_crypted
selinux --disabled
skipx
timezone --utc Europe/Paris
install
zerombr
autopart


%pre
$SNIPPET('log_ks_pre')
$kickstart_start
$SNIPPET('pre_install_network_config')
# Enable installation monitoring
$SNIPPET('pre_anamon')

%packages
$SNIPPET('func_install_if_enabled')

%post
$SNIPPET('log_ks_post')
$yum_config_stanza
$SNIPPET('post_install_kernel_options')
$SNIPPET('post_install_network_config')
$SNIPPET('func_register_if_enabled')
$SNIPPET('download_config_files')
$SNIPPET('koan_environment')
$SNIPPET('redhat_register')
$SNIPPET('cobbler_register')
$SNIPPET('post_anamon')
$kickstart_done

:wq
The Cobbler configuration is now finished, we can test the Cobbler service. We create a new VM without boot media, we must activate network/PXE in the boot sequence. Then we start this new VM that will ask an IP address to DHCP server and ask PXE for install support.COBBLER WEB
We will now install the web interface allows the administration of the cobbler and then configure:
yum install cobbler-web

vi /etc/cobbler/modules.conf

[authentication]
module = authn_configfile

[authorization]
module = authz_allowall

:wq

htdigest -c /etc/cobbler/users.digest "Cobbler"cobbler
# Type cobbler twice when asking password to have login/password: cobbler/cobbler

/etc/init.d/cobblerd restart
/etc/init.d/httpd restart
You can get on the interface with a browser to the URL: http://192.168.0.X/cobbler_web (where X must be replace with your Cobbler IP)
Login: cobbler
Password: cobbler
On this web interface, you can do everything that you can do from command line interface (CLI).
KOAN
Koan is a small program that adds to cobbler and interacts with it for reinstallation and virtualization management. Koan means: kickstart over a network, thus we can use it on a client server to calling cobbler server.
In our case, we will mainly use it for deploying virtual machines. It can be installed via yum, but a more current version is available from the EPEL repo.
Be careful about kernel used in CentOS custom ISO. In my experience, I met problems with some kernels on Xen systems using koan.
To get koan and install it:
cd /downloads
wget http://download.fedora.redhat.com/pub/epel/5/x86_64/koan-2.0.9-1.el5.noarch.rpm
rpm -i koan-2.0.9-1.el5.noarch.rpm
Here is an example of koan command to install CentOS virtual machine on Xen system (kernel 2.6.18-194.el5)
koan --virt --profile=centxenvm-xen-x86_64 --server=192.168.0.98 --virt-type=auto --nogfx --virt-name=centos –virt-path=/home/xen/centos/I don't specify the method used to deploy a new VM with koan because I had to customize a lot of thing before that the VM works... It's DIY and I'm not quite happy with it in order to describe it !
This howto is ended, I hope that you can apply it in your workspace and that you understand how having a Cobbler server working perfectly. I use a CentOS environment but I think that other distros are supported with this system. Contact me if you need more help with Cobbler.
lundi 18 juillet 2011
phpSysInfo
phpSysInfo is a PHP script that displays information about the host being accessed. It will displays things like :
- Uptime
- CPU
- Memory
- SCSI, IDE, PCI
- Ethernet
- Floppy
- Video Information
website: http://phpsysinfo.sourceforge.net/

- Uptime
- CPU
- Memory
- SCSI, IDE, PCI
- Ethernet
- Floppy
- Video Information
website: http://phpsysinfo.sourceforge.net/
vendredi 1 juillet 2011
Innotop: MySQL InnoDB Monitor
Innotop est un clone de top (ou top-like) pour MySQL, orienté innoDB. Cette application vous permet d'effectuer de la surveillance. Par ailleurs, ce projet propose plus de fonctionnalités et de souplesses par rapport aux autres outils de la même famille.
Cette nouvelle version (1.8.0) apporte de nouvelles fonctionnalités, comme :
Cette nouvelle version (1.8.0) apporte de nouvelles fonctionnalités, comme :
- Une interface en plugins entièrement configurable
- Une surveillance du nombre de serveurs avec la possibilité de les regrouper
- Une trousse à outils variés comme mytop
- De nouvelles fonctionnalités comme l'interrogation de la période
- Analyse et affiches les informations venant de InnoDB
dimanche 19 juin 2011
htop - an interactive process viewer for Linux
htop est un moniteur système pour Linux, presque le même que top, que nous connaissons tous. Mais qui propose une interface plus conviviale que ce dernier. Il est programmé en C à l’aide de la bibliothèque ‘ncurses’.
Les + de htop (par rapport à top):
+ htop permet de ‘tuer’ un processus directement, sans se soucier de son PID.
+ htop permet, de la même manière, d’augmenter/réduire la priorité d’un processus sans connaître son PID.
+ htop est plus user-friendly, dans ses raccourcis, sa présentation, et le scroll.
+ htop permet un affichage en arborescence, identifiant clairement les processus pères et fils.
+ htop est plus rapide.
+ htop gère la souris.
+ htop intègre une jauge de l’utilisation de la mémoire vive, cpu et swap.
Screenshot:

Le site de htop: http://htop.sourceforge.net/
Un outil indispensable !
Les + de htop (par rapport à top):
+ htop permet de ‘tuer’ un processus directement, sans se soucier de son PID.
+ htop permet, de la même manière, d’augmenter/réduire la priorité d’un processus sans connaître son PID.
+ htop est plus user-friendly, dans ses raccourcis, sa présentation, et le scroll.
+ htop permet un affichage en arborescence, identifiant clairement les processus pères et fils.
+ htop est plus rapide.
+ htop gère la souris.
+ htop intègre une jauge de l’utilisation de la mémoire vive, cpu et swap.
Screenshot:
Le site de htop: http://htop.sourceforge.net/
Un outil indispensable !
WebWait - Benchmark your Website
WebWait est un site permettant de tester votre connexion web ainsi que les performances de votre site. En effet, on va mesurer le temps d'accès au site.
Il suffit d'entrer l'URL du site web et de cliquer sur le bouton "Time it !". On peut préciser le nombre d'appels et l'intervalle entre ces appels pour le bench.
Sur la partie droite, on peut voir un aperçu du site testé.
A la fin du test, le résultat affiché correspond à la moyenne du temps d'accès sur la totalité des appels.
Ceci permettra d'avoir une idée sur les performances du site testé et de constater la fluidité de la navigation coté utilisateur.
Voici le lien vers WebWait: http://webwait.com/
vendredi 10 juin 2011
(R)?ex What do you want to deploy today ?
Let me introduce a new project that will make a lot of noise !
This project is named Rex and it's for lazy sysadmins.
You can manage files, directories, packages, services and many more on all of your servers.
Features are:
The definition of tasks and profiles is very easy,
You need just a ssh connection, no agent is required,
Run tasks parallel,
Customization is really easy,
Currently supports on Debian, Fedora, CentOS and OpenSuSE
It is based on Perl and you don't need to control perfectly the perl language for playing with Rex.
Current version is 0.6.0
I tried to use fabric (based on python) but it was more difficult to customise tasks and to do what I want.
I find rex and I advise you to use it !
Website is http://rexify.org
You will find all informations there.
IRC on irc.freenode.net channel #rex
jeudi 9 juin 2011
Widget: carte 3D des visiteurs
Voici un widget très fun qui permet de visualiser où sont situés géographiquement les visiteurs de votre site à travers un globe terrestre en 3D.
C'est en plus très simple de mettre ce globe sur son site, il suffit d'aller sur le site http://www.revolvermaps.com/
Vous cliquez ensuite sur "Get Your Globe" et vous allez pouvoir personnaliser les caractéristiques de votre widget en 4 étapes: type de globe, dimensions de celui-ci, couleur des marqueurs et quelques paramètres avancés.
Il ne reste plus qu'à copier le code généré et l'insérer dans la page web de votre site.
Voici un aperçu de ce widget:

vendredi 3 juin 2011
Google version geek
Voici un site qui a déjà fait pas mal de parler de lui mais pour ceux qui ne connaissent pas, ça peut être intéressant. Il s'agit en fait d'une version très geek du moteur de recherche le plus utilisé aujourd'hui.
lundi 7 mars 2011
Customize CentOS
This is the method that I use to customize CentOS x86_64 distro. The objective of this operation is reducing image install used for server. We need those two ISO: CentOS x86_64 netinstall and CentOS x86_64 CD1. CentOS netinstall permits you to install a fresh mini install but there's yet in this way some packages that are useless for using on a server. On netinstall install, where only the vim package is selected , all the following packages are useless for me: wireless-tools xorg-x11-filesystem Deployment_Guide-fr-FR libXcursor rhpl libpng libjpeg libtiff cups-libs bitstream-vera-fonts fontconfig libXft libXext libXcursor libXrandr libXdmcp libXinerama ecryptfs-utils gtk2 libX11 libXi libXrender cairo trousers libXau libXfixes But some others useful packages for server were not installed: slocate autoconf automake rsync make imake m4 man yum-utils elinks telnet First, you have to do this fresh mini netinstall for create a local repository, because customising an ISO, for reducing it, essentially requires the removal of unnecessary packages. So when install is done. We create a mini local repository, with packages installed on this fresh install. Those that will be included into the custom ISO. How to:
# remove useless packages
yum remove wireless-tools xorg-x11-filesystem Deployment_Guide-fr-FR libXcursor rhpl libpng libjpeg libtiff cups-libs bitstream-vera-fonts fontconfig libXft
libXext libXcursor libXrandr libXdmcp libXinerama ecryptfs-utils gtk2 libX11 libXi libXrender cairo trousers libXau libXfixes -y

# install required packages
yum install slocate autoconf automake rsync make imake m4 man yum-utils elinks telnet yum-utils -y

# listing all packages and download them into temp directory
rpm -qa > /home/rpm.log && mkdir /tmp/rpm
for i in $(cat /home/rpm.log) ; do yumdownloader "$i" -y --destdir /tmp/rpm ; done

# To create repo (useless for customize CentOS ISO)
yum install createrepo -y
createrepo /tmp/rpm/
cd /etc/yum.repos.d/

vi local.repo

[localrepo]
name= CentOS Server $releasesever - My Local Repo
baseurl=file:///tmp/rpm/
enabled=1
gpgcheck=0
#gpgkey=file:////etc/pki/rpm-gpg/RPM-GPG-KEY-CentOS-5

:wq
Now packages are downloaded and we can start to build new ISO. To customize CentOS distro, we only need of the first CentOS CD among eight medias CD for normal install. Thus after downloading, mount the iso on this linux server and customise your distro. How to Second part :
# Create directories
mkdir /mnt/cdimages/
mkdir /mnt/cdimages/CentOS-5.5-x86_64
mkdir /mnt/cdimages/CentOS-5.5-x86_64-core

# Mount ISO
mount -t iso9660 -oloop,ro /home/CentOS-5.5-x86_64-bin-1of8.iso /mnt/cdimages/CentOS-5.5-x86_64

# Install needed packages
yum install mkisofs cdrecord

# Rsync ISO content to new CentOS minimal core
rsync -av --exclude CentOS/ /mnt/cdimages/CentOS-5.5-x86_64/ /mnt/cdimages/CentOS-5.5-x86_64-core/
mkdir /mnt/cdimages/CentOS-5.5-x86_64-core/CentOS
cp -r /tmp/rpm/* /mnt/cdimages/CentOS-5.5-x86_64-core/CentOS/

# Edit comps.xml
cd /mnt/cdimages/CentOS-5.5-x86_64-core
wc -l repodata/comps.xml # 11418 repodata/comps.xml
grep "xml:lang" repodata/comps.xml | wc -l # 8811
grep -v "xml:lang" repodata/comps.xml > /tmp/no-lang.comps.xml
wc -l /tmp/no-lang.comps.xml # 2607 /tmp/no-lang.comps.xml
rm repodata/* -f
cp /tmp/no-lang.comps.xml repodata/comps.xml

# Test RPM dependencies
cd /mnt/cdimages/CentOS-5.5-x86_64-core/CentOS
mkdir /tmp/testrpmdb
rpm --initdb --dbpath /tmp/testrpmdb/
rpm --test --dbpath /tmp/testrpmdb/ -ivh *.rpm

echo $? # 0
du -sh /tmp/testrpmdb/ # 644K /tmp/testrpmdb/
rm -rf /tmp/testrpmdb

# Create repo
yum install createrepo -y
cd /mnt/cdimages/CentOS-5.5-x86_64-core
cat .discinfo
export discinfo=$(head -1 /mnt/cdimages/CentOS-5.5-x86_64-core/.discinfo)
echo $discinfo
createrepo -u "media://$discinfo" -g repodata/comps.xml /mnt/cdimages/CentOS-5.5-x86_64-core

# Create bootable ISO
export isofilename=/mnt/cdimages/CentOS-5.5-x86_64-core.iso

mkisofs -r -R -J -T -v \
-no-emul-boot -boot-load-size 4 -boot-info-table \
-V "CentOS-5u5-core 64 bit" -p "CentOS_Custom" -A "CentOS-5u5-core 64 bit-2011/01/01" \
-b isolinux/isolinux.bin -c isolinux/boot.cat -x "lost+found" \
-o $isofilename /mnt/cdimages/CentOS-5.5-x86_64-core
# 213685 extents written (417 MB)

# Implant MD5SUM in the ISO file
yum install mkcdrec
updatedb
locate implantisomd5
/var/opt/mkcdrec/bin/implantisomd5 $isofilename

## Use New CentOS ISO: /mnt/cdimages/CentOS-5.5-x86_64-core.iso
You can now try to install new virtual machine with this new ISO media boot to check that everything works perfectly.
mercredi 19 janvier 2011
Automatically load kernel modules at boot time
If you need to load some modules when server boot, you have to do the following:
echo "modprobe [module_name]" > /etc/sysconfig/modules/[module_name].modules
chmod +x /etc/sysconfig/modules/[module_name].modules
Here is an example with fuse module:
echo "modprobe fuse" > /etc/sysconfig/modules/fuse.modules
chmod +x /etc/sysconfig/modules/fuse.modules
On the next reboot, /etc/rc.sysinit script will load all scripts that located into /etc/sysconfig/modules directory.
How to compile MySQL 5.5 from sources
MySQL released 5.5 version in December 2010. This version seems to be more efficient with improvements like better improved scalability on multi-core CPU, InnoDB storage engine becomes the default engine for new tables or integration of semisynchronous replication.
This version is recommended for production environments. It's interesting for administrator to thinking about upgrading. Much systems executes 5.1 version and sometimes the upgrade can be scary ... Here we are going to see how to install 5.5 version on new systems.
First we need to install some packages that are needed by MySQL. So installs (or be sure that they all have been installed): bison, bzr, cmake, gcc-c++ ncurses-devel.
yum install -y bison bzr cmake gcc-c++ ncurses-develThen add new mysql account and group:
groupadd mysql
useradd -r -g mysql mysql
Now we need download last mysql 5.5 tar.gz archive, choose the mirror directly on mysql website.
wget http://URL_OF_MIRROR/mysql-5.5.16.tar.gzExtracting tar.gz archive
tar -xvzf /downloads/mysql-5.5.16.tar.gzNow go into extracted directory and execute cmake:
cd /downloads/mysql-5.5.16/
cmake . -DCMAKE_INSTALL_PREFIX=/opt/mysql \
-DMYSQL_DATADIR=/var/lib/mysql \
-DSYSCONFDIR=/etc \
-DINSTALL_PLUGINDIR=/opt/mysql/lib/mysql/plugin
Note that I use /opt/mysql for basedir /var/lib/mysql for datadir, you can use others directories by specifing them with 'DCMAKE_INSTALL_PREFIX' and '-DMYSQL_DATADIR' options. When cmake finish to work, we can launch the make .
makeNext, if we don't encounter errors, we launch the install:
make installNow, we create symbolic links to have mysql commands in shell:
ln -s /opt/mysql/bin/* /usr/bin/Assign owner and group:
cd /opt/mysql/
chgrp -R mysql .
chown -R root .
chown -R mysql data
Default database installation:
scripts/mysql_install_db --user=mysql \
--datadir=/var/lib/mysql/
Copy a mysql default configuration file:
cp support-files/my-medium.cnf /etc/my.cnfCopy mysql init.d script and make it executable:
cp support-files/mysql.server /etc/init.d/mysql.server
chmod 755 /etc/init.d/mysql.server
Now edit this init.d script for customize both basedir and datadir paths:
vim /etc/init.d/mysql.server
## replace
basedir=
basedir=

## by
basedir=/opt/mysql
datadir=/var/lib/mysql

## save and exit
:wq
Finally, we can launch mysql server and begin to use it:
/etc/init.d/mysql.server start
samedi 15 janvier 2011
Download RPM packages with yum
Yum don't keeps RPM packages when you install from itself. So when you need to backup those packages locally, it's interesting to have a way for do this. There is few methods that permit to do it.
First method is to configure yum.conf with keepcache=1, packages will be archived into path who is specified into cachedir parameter.
Problem is that system will download packages for the future but packages that have already been installed will be not stocked in the cachedir path.
vi /etc/yum.conf

cachedir=/var/cache/yum
keepcache=1
Second method is to use yum-downloadonly. This is a yum plugin that adds --downloadonly flag to yum. With this method yum is going to download RPM packages without install or update them. Plugin adds two options to yum: --downloadonly : indicates to yum to just download without install or update packages. --downloaddir=/path/to/dir : specifies directory for storing packages. Here we are going to download and install this yum plugin:
yum install yum-downloadonly -yNow we can use two news flags that were added to yum: Here we donwload vsftpd in the current directory (we can use install or update, done the same):
yum install vsftpd -y --downloadonlyOr we can download vsftpd to home directory:
yum update vsftpd -y --downloadonly --downloaddir=/homevsftpd package is now stored into /home:
ls /home/*Same problem for this second method: if packages are already installed on this CentOS server, yum don't downloads packages and says "already installed and latest version" or "No Packages maked for Update". Third method consists to use yumdownloader which is included into yum-utils. yum-utils is a collection of tools that permit yum to be most complete. So we have to install yum-utils with:
yum install yum-utils -yNow we can download easily packages from CentOS repositories. This method is more fun because we can now download packages that are already installed on server. For example we check that vsftpd is already installed:
rpm -qa | grep vsftpd
vsftpd-2.0.5-16.el5_5.1
And now we download this package from repository to store it into home directory:
yumdownloader vsftpd --destdir /homeThen:
ls /home/*
vsftpd-2.0.5-16.el5_5.1.i386.rpm
Possibles options for yumdownloader are: --destdir : to specify where to store packages --urls : list the urls it would download instead of downloading --resolve : resolve dependancies and download required packages --source: operate on source packages --archlist: only download packages of certain architectures (i386,i686,x86_64,noarch) Last method can be an alternative method, but it's not the better way. It consists to use wget. With wget we can download directly packages from an url but we have to know exactly where packages are stored on the web. Sometimes it's difficult to guess if package come from base repo or from updates repo, so this method is useful in some context. If wget command isn't available you have to install it with:
yum install wget -yThen you can download package from url with wget:
wget http://mirror.ate.info/ftp.centos.org/5.5/updates/i386//RPMS/vsftpd-2.0.5-16.el5_5.1.i386.rpmPackage will be stored into current directory. To store it into another directory, use this command instead:
wget http://mirror.ate.info/ftp.centos.org/5.5/updates/i386//RPMS/vsftpd-2.0.5-16.el5_5.1.i386.rpm -P /homeIt will be stored into home directory. I hope this article can help you and it will give you better way to handle RPM packages with the powerful yum.
Inscription à :
Articles (Atom)